Crawl Space Encapsulation
Improving your home’s efficiency and indoor air quality can be achieved through a crucial step: encapsulating your crawl area. This process not only enhances the overall health of your home but also reduces energy costs.
By encapsulating your crawl area, you can prevent moisture buildup, reduce the risk of mold and mildew, and create a healthier living environment. We will guide you through the benefits, costs, and step-by-step process involved in this home improvement project.
Our comprehensive guide will walk you through the process, providing you with a clear understanding of how to improve your home’s crawl area and reap the benefits of a well-maintained crawl space.
Understanding Crawl Space Encapsulation
Encapsulating your crawl space is a significant step towards improving your home’s energy efficiency and indoor air quality. This process involves sealing and insulating the crawl space to prevent moisture and air leaks, which can have a substantial impact on your home’s overall health.
What It Means for Your Home
By encapsulating your crawl space, you create a barrier that protects your home from dampness and dirt. This not only improves the structural integrity of your home but also contributes to a healthier living environment.
Key Benefits
Crawl space encapsulation offers several key benefits. Two of the most significant advantages are related to energy efficiency and indoor air quality.
Energy Efficiency Improvements
Encapsulation helps reduce heating and cooling costs by minimizing air leaks and maintaining a consistent temperature.
Indoor Air Quality Enhancement
By preventing moisture buildup, encapsulation reduces the risk of mold and mildew, thereby enhancing the indoor air quality.
Planning Your Crawl Space Encapsulation Project
Before diving into your crawl space encapsulation project, it’s crucial to plan carefully to ensure a successful outcome. A well-planned project helps you understand the scope of work, required materials, and potential costs involved.
Assessing Your Current Crawl Space
Start by assessing your crawl space to identify any existing issues, such as moisture problems, pest infestations, or structural damage. This assessment will help you determine the extent of the work needed. “A thorough assessment is key to a successful crawl space encapsulation,” as it allows you to address all potential issues upfront.
Required Materials and Tools
Gathering the right materials and tools is essential for a successful encapsulation project. You’ll need a vapor barrier, insulation, sealing tapes, and potentially a dehumidification system. Ensure you have all necessary materials before starting the project.

Cost Considerations
The cost of crawl space encapsulation varies depending on the size of your crawl space, materials used, and whether you opt for DIY or professional installation. On average, costs can range from $2,000 to $15,000 or more. Understanding these costs upfront helps you budget accordingly.
DIY vs. Professional Installation
Deciding between DIY and professional installation depends on your comfort level with the project and its complexity. While DIY can save on labor costs, professional installation ensures the job is done correctly and efficiently. “Professional installation can provide peace of mind and a warranty on the work done,” making it a worthwhile investment for many homeowners.
Step-by-Step Crawl Space Encapsulation Process
To effectively encapsulate your crawl space, follow a systematic approach that addresses various critical factors. This ensures a successful project that protects your home from moisture-related issues.
Step 1: Clean and Prepare the Space
Begin by clearing your crawl space of debris, old insulation, and any other obstructions. This step is crucial for a successful encapsulation project.
Ensure the area is well-lit and ventilated to facilitate the work ahead.
Step 2: Address Drainage and Moisture Issues
Inspect your crawl space for any signs of water damage or moisture accumulation. Address these issues by improving drainage and sealing any entry points for water.
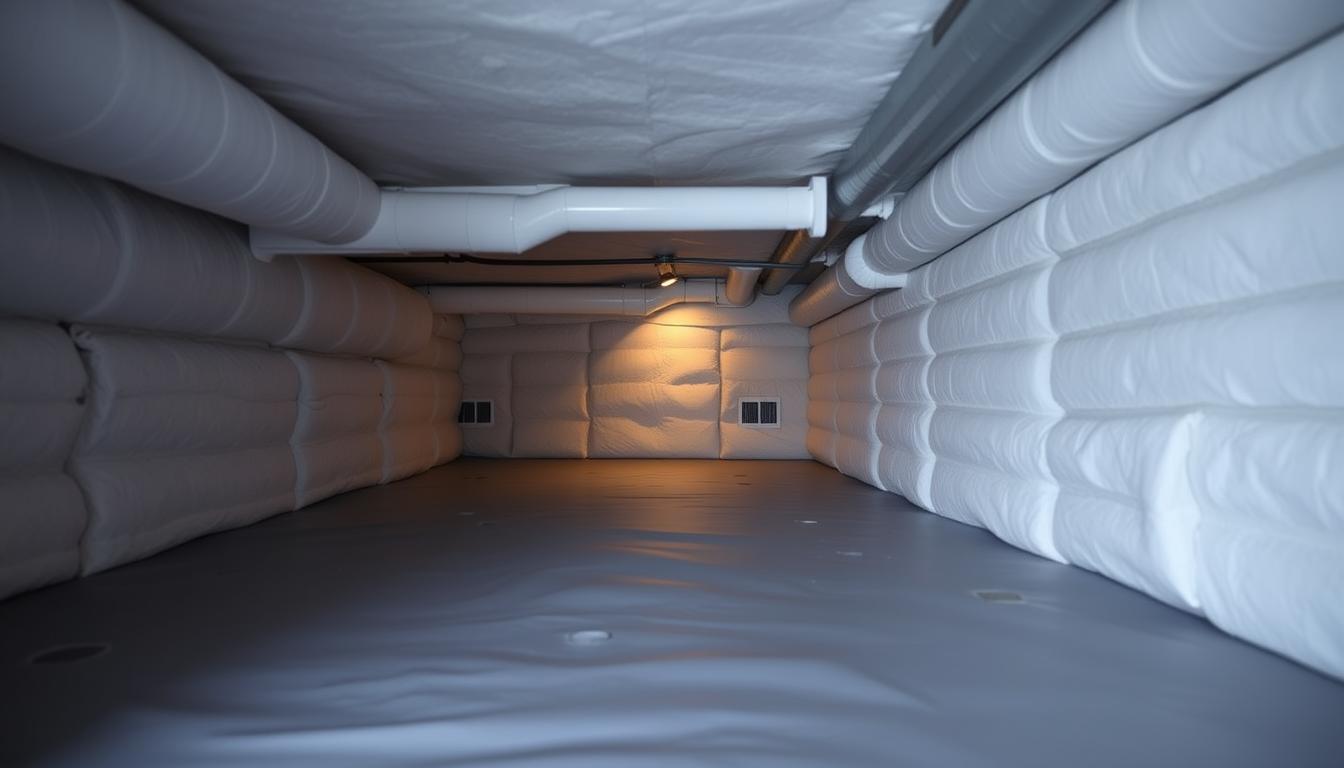
Step 3: Install Vapor Barrier and Seal
Install a high-quality vapor barrier on the floor and walls of your crawl space. Ensure it is properly sealed at the seams and around any penetrations.
Step 4: Insulate Walls (If Necessary)
Depending on your climate and local building codes, you may need to insulate the walls of your crawl space. Use insulation materials suitable for crawl spaces.
Step 5: Add Dehumidification System
Consider installing a dehumidification system to maintain a dry environment in your crawl space. This is especially important in humid climates.
By following these steps, you can ensure a successful crawl space encapsulation project that enhances your home’s energy efficiency and reduces the risk of moisture-related problems.
Maintaining Your Newly Encapsulated Crawl Space
After completing the crawl space encapsulation process, it’s essential to maintain your newly encapsulated crawl space to enjoy its long-term benefits. Regular inspections will help ensure the vapor barrier remains intact, and the dehumidification system is functioning correctly.
We recommend checking the crawl space regularly for any signs of damage or wear. This includes inspecting the vapor barrier for tears or damage and verifying that the dehumidification system is working as expected. By performing these simple tasks, you can help maintain a healthy and energy-efficient home.
Proper crawl space maintenance, including encapsulated crawl space maintenance, is crucial for improving energy efficiency and indoor air quality. By following these tips, you can ensure your investment in crawl space encapsulation continues to pay off.