Homemade Ice Melt
As we navigate the challenges of winter, keeping our walkways and driveways clear of ice is crucial for safety. We need effective solutions to prevent accidents and ensure our outdoor spaces remain accessible.
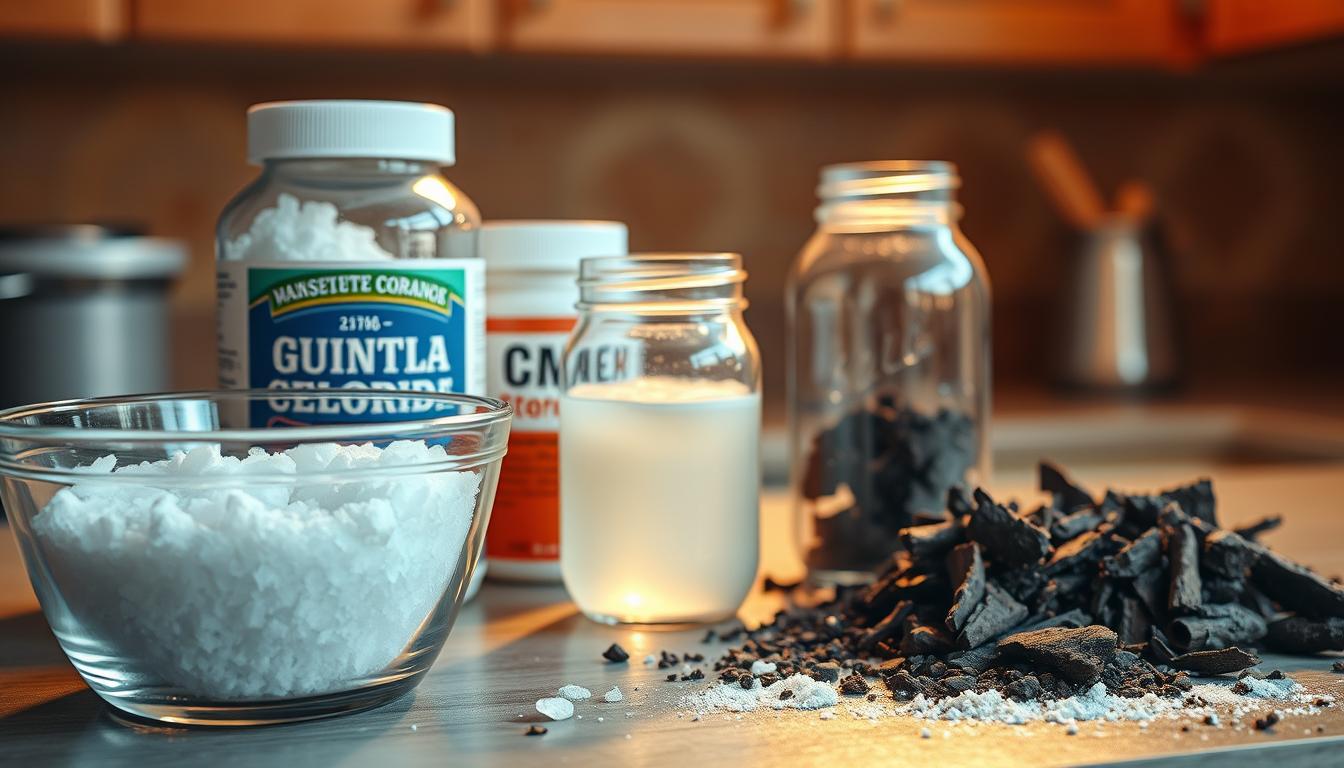
Using DIY ice melt solutions can be both safe and effective. We can create our own ice melt using common household items, which is not only easy on the wallet but also environmentally friendly.
By exploring various DIY recipes and methods, we can find the best approach for our needs. This approach allows us to avoid harsh chemicals and reduce our environmental footprint while keeping our outdoor spaces safe and clear.
Benefits of Making Your Own Ice Melt
By opting for a DIY ice melt, you’re choosing a path that’s both budget-friendly and gentle on the environment. Making your own ice melt isn’t just a cost-effective solution for the winter months; it’s also a step towards reducing the environmental impact associated with commercial ice melts. As we explore the benefits of homemade ice melt, it becomes clear that this simple switch can have significant advantages.
Environmental Advantages Over Commercial Products
Commercial ice melts often contain chemicals like rock salt (sodium chloride) or calcium chloride, which can be harmful to local wildlife, contaminate soil, and pollute water sources. In contrast, homemade ice melt solutions can be made with environmentally friendly ingredients.
Some eco-friendly alternatives for homemade ice melts include using sand for traction, or natural products like vinegar or alfalfa meal, which can lower the freezing point of water and are less harmful to the environment.
- Sand: Provides traction without the chemical risks.
- Vinegar: Lowers the freezing point of water.
- Alfalfa Meal: A natural, non-toxic alternative.
Cost Savings Throughout Winter
Buying commercial ice melt products in bulk can be expensive, and it’s often hard to predict exactly how much you’ll need for the season. With a homemade solution, you can purchase ingredients in bulk and make as much ice melt as you need, reducing waste and saving money.
For example, using common household items like salt (sodium chloride) or rubbing alcohol can be very cost-effective. A simple recipe might involve mixing salt with sand for traction or using a solution of water and rubbing alcohol to lower the freezing point.
| Ingredient | Cost | Quantity |
|---|---|---|
| Salt | $2/bag | 50 lbs |
| Rubbing Alcohol | $3/bottle | 1 liter |
“Switching to homemade ice melt is a straightforward way for individuals to reduce their environmental footprint during the winter months.”
Best Homemade Ice Melt Recipes
Now that we’ve explored the benefits of making your own ice melt, let’s dive into some effective homemade ice melt recipes. Creating your own ice melt solution is not only cost-effective but also allows you to customize it according to your needs.
Salt-Based Solutions
Salt-based solutions are among the most effective homemade ice melt recipes. They work by lowering the freezing point of water, thus melting ice and preventing further ice formation.
Table Salt and Hot Water Mixture
A simple and effective ice melt recipe involves mixing table salt with hot water. The hot water helps to dissolve the salt more efficiently, creating a solution that can melt ice effectively.
- Mix 1 cup of table salt with 1 gallon of hot water.
- Stir until the salt is fully dissolved.
- Use the solution on icy surfaces.
Epsom Salt and Dish Soap Formula
Another effective recipe involves using Epsom salt and dish soap. The Epsom salt acts as a deicer, while the dish soap helps to reduce the surface tension of the solution, making it more effective at penetrating and melting ice.
- Mix 1/2 cup of Epsom salt with 1 quart of warm water.
- Add a few drops of dish soap.
- Stir well and apply to icy areas.

Alcohol and Household Alternatives
For those looking for alternatives to salt-based solutions, there are several household items that can be used to make effective ice melt recipes.
Rubbing Alcohol Spray Method
Rubbing alcohol can be used as an effective deicer due to its low freezing point. Mixing it with water creates a solution that can be sprayed onto icy surfaces.
- Mix equal parts rubbing alcohol and water in a spray bottle.
- Spray onto icy surfaces.
Vinegar and Water Solution
Vinegar is another household item that can be used to make a homemade ice melt. The acidity in vinegar helps to lower the freezing point of water, making it effective at melting ice.
- Mix 1 part vinegar with 2 parts water.
- Apply the solution to icy areas.
Storage and Preparation Tips
To ensure you’re always ready for icy conditions, it’s a good idea to prepare and store your homemade ice melt solutions in advance.
- Store solutions in airtight containers to prevent contamination and evaporation.
- Label containers clearly with the date and contents.
- Keep solutions in an easily accessible location.
Using Your DIY Ice Melt Effectively and Safely
As we enjoy the benefits of our homemade ice melt solutions, it’s crucial to use them effectively and safely to ensure a hazard-free winter. When applying DIY ice melt, we must be mindful of the surfaces we’re treating to avoid damage. For instance, certain salt-based solutions can harm concrete or metal if not used properly.
To maintain winter safety, we should take precautions to protect pets and wildlife from ingesting these solutions. We also need to be aware of the potential risks to people, particularly those with certain health conditions. By being cautious and using our DIY ice melt responsibly, we can enjoy clear walkways and driveways while minimizing risks associated with commercial ice melts.
By following these simple guidelines for DIY ice melt safety, we can have a safer winter season. Our homemade solutions, when used correctly, provide an effective and environmentally friendly alternative to commercial products.