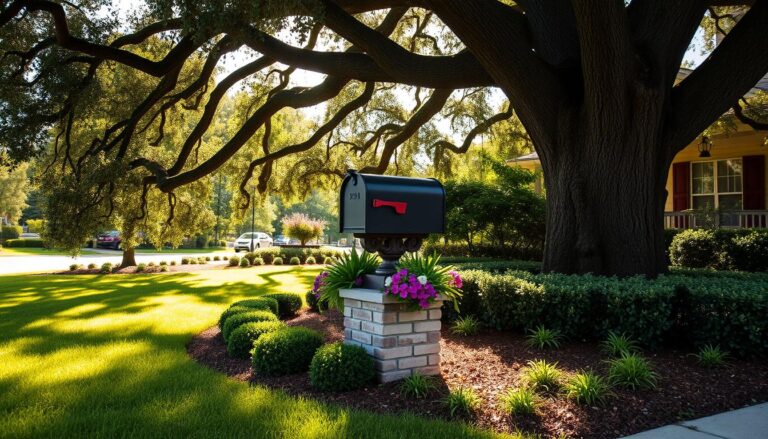
Raised Garden Beds
Gardening enthusiasts are increasingly turning to Raised Garden Beds to enhance their outdoor spaces. We explore how these DIY Garden Beds can transform your gardening experience, making it more accessible and enjoyable.
By creating your own Raised Garden Beds, you can enjoy a more controlled gardening environment. This guide will walk you through the process, providing a step-by-step tutorial on how to get started with Gardening using DIY Garden Beds.
Our goal is to make gardening easy and fun, and we believe that Raised Garden Beds are an excellent way to start. Whether you’re a seasoned gardener or just beginning, this guide is designed to help you succeed.
Benefits of Raised Garden Beds
Gardening with raised beds can significantly enhance your overall gardening experience. By elevating your garden, you can enjoy a multitude of benefits that make gardening more accessible and enjoyable.
Better Soil Control and Drainage
One of the primary advantages of raised garden beds is the ability to control the soil quality and drainage. By using a mix specifically designed for raised beds, you can ensure your plants receive the right nutrients. Improved drainage also prevents waterlogged soil, reducing the risk of root rot.
Here’s a comparison of the soil control and drainage in raised beds versus traditional gardening:
| Feature | Raised Garden Beds | Traditional Gardening |
|---|---|---|
| Soil Quality Control | High | Variable |
| Drainage | Excellent | Poor to Fair |
Reduced Back Strain and Easier Maintenance
Raised garden beds are typically waist-high, reducing the need to bend or kneel, which can strain your back. This design makes maintenance tasks such as weeding, watering, and harvesting much easier. The defined bed boundaries also help in keeping the garden organized.
Extended Growing Season
The soil in raised beds warms up faster in the spring, allowing for an earlier start to the growing season. Additionally, the improved drainage and soil quality can extend the growing season into the fall. This means you can enjoy a longer period of fresh produce from your garden.
By adopting raised garden beds, you can significantly improve your gardening experience, making it more efficient, enjoyable, and productive.
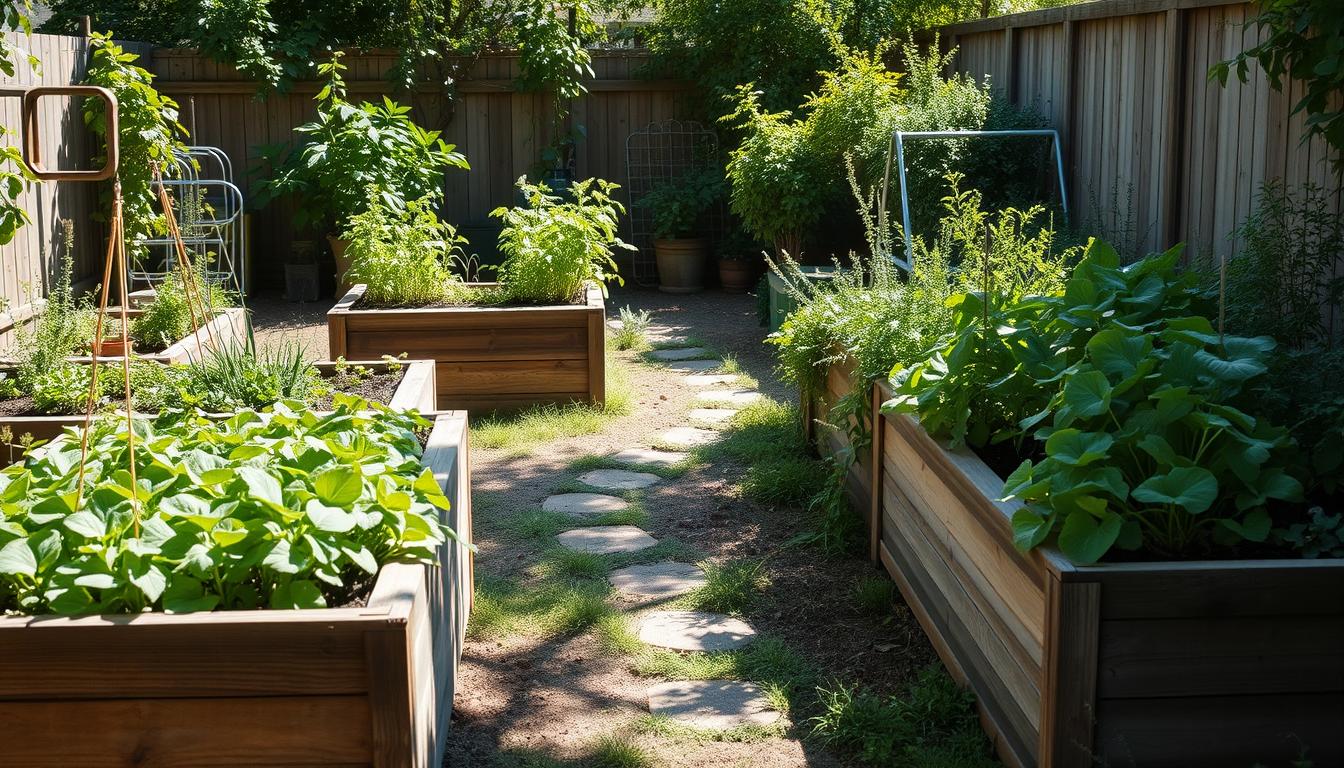
Materials and Tools for Building Raised Garden Beds
The key to a beautiful and productive garden lies in the materials and tools you choose for your raised garden beds. Building a DIY garden bed requires careful planning and the right equipment to ensure a successful gardening experience.
Selecting the Right Wood and Materials
When it comes to building raised garden beds, the type of wood and materials you use can significantly impact the durability and health of your plants. Cedar and redwood are popular choices due to their natural resistance to rot and insects. Alternatively, you can use recycled materials like old pallets or reclaimed wood, keeping in mind the potential for nails or other contaminants.
For a garden layout that is both functional and aesthetically pleasing, consider the size and height of your raised beds. A height of at least 6 inches is recommended to allow for good root growth.

Essential Tools for Construction
To assemble your raised garden beds, you’ll need a few essential tools. These include a saw for cutting wood, a drill for screwing the pieces together, and a hammer for tapping them into place. A tape measure and square will help ensure your beds are properly aligned and constructed.
Optional Accessories for Enhanced Results
To further enhance your gardening experience, consider adding optional accessories such as irrigation systems, trellises, or covers to protect your plants from pests or harsh weather conditions.
| Material/Tool | Description | Benefits |
|---|---|---|
| Cedar or Redwood | Types of wood resistant to rot and insects | Durable, long-lasting |
| Saw | For cutting wood to the required size | Essential for precise cuts |
| Irrigation System | Optional accessory for efficient watering | Reduces water waste, promotes healthy growth |
By choosing the right materials and tools for your raised garden beds, you can create a thriving garden that brings joy and bounty to your outdoor space. Happy gardening!
Building Your Raised Garden Beds: Step-by-Step Instructions
Building a raised garden bed is a straightforward process that can be completed with basic DIY skills. By following these steps, you can create a beautiful and functional garden that will provide you with fresh produce for years to come.
Planning Your Garden Layout
Before you start building your raised garden bed, it’s essential to plan your garden layout carefully. Consider the space available, the amount of sunlight your garden receives, and the type of plants you want to grow.
Determining the Ideal Size and Location
The size and location of your raised garden bed will depend on several factors, including the space available and the type of plants you want to grow. Choose a location that receives the right amount of sunlight for your plants, and ensure that the bed is accessible from all sides.
| Plant Type | Sunlight Requirements | Ideal Bed Size |
|---|---|---|
| Vegetables | 6-8 hours direct sunlight | 4×8 feet |
| Herbs | 4-6 hours direct sunlight | 2×4 feet |
| Flowers | 6-8 hours direct sunlight | 4×4 feet |
Preparing the Site
Once you have planned your garden layout, it’s time to prepare the site. This involves clearing the area of any debris and leveling the ground to ensure that your raised garden bed is stable and even.
Clearing and Leveling the Ground
Clear the area of any debris, grass, or weeds. Use a level tool to ensure the ground is even, and make any necessary adjustments.
Assembling the Frame
With the site prepared, you can now assemble the frame for your raised garden bed. Use durable materials that can withstand the elements and support the weight of the soil.
Securing Corners and Reinforcing Sides
Use corner brackets to secure the corners of your raised garden bed, and reinforce the sides with additional supports as needed.
Filling Your Raised Bed with Soil
The final step is to fill your raised garden bed with a high-quality soil mix. This will provide your plants with the nutrients they need to thrive.
Creating the Perfect Soil Mix
A good soil mix should include a combination of topsoil, compost, and perlite or vermiculite. The exact ratio will depend on the type of plants you are growing.
- Topsoil provides a solid foundation for your plants.
- Compost adds nutrients and improves soil structure.
- Perlite or vermiculite enhances drainage and aeration.
Seasonal Care Tips for Thriving Garden Beds
To keep your raised garden beds thriving throughout the year, it’s essential to understand the seasonal care they require. As we discussed earlier, building your raised garden beds is just the first step in creating a rewarding gardening experience. Now, let’s dive into the seasonal tips that will help you maintain soil health, manage pests and diseases, and prepare your beds for changing weather conditions.
In the spring, start by refreshing the soil with a mix of compost and fertilizer. This will provide your plants with the necessary nutrients to grow strong and healthy. As the weather warms up, keep an eye out for pests and diseases, and take action promptly to prevent their spread. Summer is the peak growing season, so ensure your plants receive adequate water and sunlight.
As fall approaches, begin preparing your garden beds for the colder months by adding a layer of mulch or straw to protect the soil. In the winter, consider using row covers or other protective measures to shield your plants from harsh weather conditions. By following these seasonal care tips, you’ll be able to enjoy a thriving backyard gardening experience year-round, and maintain your garden with ease, focusing on garden maintenance.